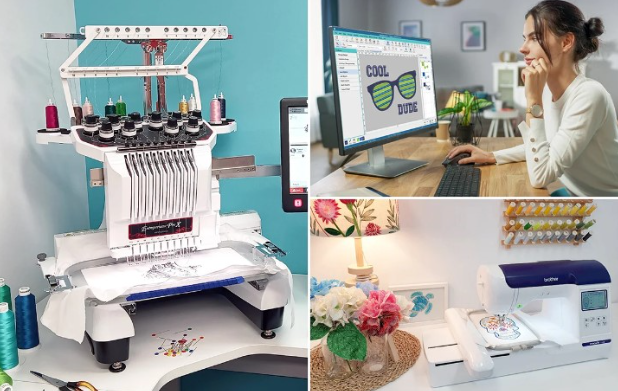
If you run an embroidery business or work with customized apparel, you already know that your design is only as good as the file you put into your machine. That’s where Custom Embroidery Digitizing Services come in. They turn flat artwork into a file your machine understands and that file decides everything: the stitch direction, density, underlay, pull compensation, and even how clean your final output looks.
In short, if digitizing is off, the embroidery will definitely be off.
But when done right? Your stitching looks sharp, smooth, and professional every single time.
This guide breaks down everything you need to know about digitizing services for embroidery machines, why stitch density and pathing matter so much, and how to get flawless results for hats, jackets, shirts, and more.
What Is Embroidery Digitizing?
Embroidery digitizing is the process of converting regular artwork into a stitch-ready file like PES, DST, EXP, JEF, VP3, and more. It’s not an auto-convert job—real digitizing involves skill, experience, and understanding how different fabrics respond to stitching.
In simple words:
Artwork → Digitizing Software → Embroidery Machine File → Stitch Output
Digitizing is a mix of art and technical knowledge.
A professional digitizer adjusts:
- Stitch density
- Underlay type
- Thread direction
- Stitch path
- Pull & push compensation
- Fabric type adjustments
- Thread color mapping
- Layer sequencing
These decisions determine whether your final design looks clean… or like a messy blob.
Why Digitizing Quality Matters More Than the Machine
People often assume that the embroidery machine is the most important factor.
But here’s the truth:
The machine only follows what the digitizing file tells it.
Even a $10,000 machine will produce bad results if the file is poorly digitized.
Quality digitizing guarantees:
- Smooth curves
- Sharp corners
- No loose threads
- No thread breaks
- Compact satin stitches
- Balanced fill stitches
- Perfect lettering clarity
If your design looks jagged, bunched, or uneven, the problem is almost always the digitizing, not the machine.
Why Stitch Density Is the Heart of Quality Embroidery
Stitch density refers to how close the stitches are to each other. Too dense, and the fabric puckers. Too loose, and the design looks empty.
When Stitch Density Is Too High
- Fabric puckering
- Thread breaks
- Needle breaks
- Heavy, stiff design
- Slow production
When Stitch Density Is Too Low
- Gaps in fill areas
- Inconsistent color
- Thin-looking outlines
- Uneven textures
A skilled digitizer balances density based on:
- Fabric type (cotton vs. polyester vs. fleece vs. leather)
- Design size
- Stitch type
- Thread weight
This is what separates professionals from cheap auto-digitizers.
Why Stitch Pathing Makes or Breaks Your Workflow
Stitch pathing determines the order in which the design stitches.
Good pathing ensures:
- Smooth stitching
- No unnecessary jump stitches
- Efficient trimming
- Faster embroidery time
- Cleaner finish
Bad pathing often leads to:
- Excessive jumps
- Long trims
- Misaligned outlines
- Increased thread breaks
A well-path’d design always runs faster and cleaner.
Types of Embroidery Digitizing Services
1. Logo Digitizing
Perfect for business logos, patches, uniforms, and branding.
Logos require precise density and underlay, especially for small details.
2. Hat/Cap Digitizing
Caps require special settings because of their curved surface.
Digitizing for hats typically starts from the center and works outward to prevent distortion.
3. Jacket Back Digitizing
Large designs need controlled fill patterns and minimal thread changes to avoid a heavy finish.
4. 3D Puff Digitizing
Puffy foam embroidery requires specific satin stitch techniques and capping stitches to cleanly slice the foam.
5. Patch Digitizing
Patch borders need tight satin borders and exact edge alignment.
6. Appliqué Digitizing
Used to reduce stitches on large areas and give a fabric-overlay effect.
How Fabric Type Influences Digitizing
Great digitizing is never “one-size-fits-all.”
Each fabric behaves differently when stitched.
For Cotton
- Moderate density
- Standard underlay
- Works well with most designs
For Polyester/Performance Wear
- Lower density
- Light underlay
- Requires pull-compensation to avoid distortion
For Hoodies/Fleece
- Strong underlay
- Thicker stitching
- Prevents sinking into the garment
For Leather
- Minimal puncture stitching
- Longer stitches
- Controlled density
For Caps
- Stiff backing
- Tight density
- Center-out stitching
A professional digitizer always adjusts settings based on fabric type.
Common Problems Good Digitizing Solves
If you see any of these issues, the file is likely poorly digitized:
- Letters look broken or unreadable
- Curves appear jagged
- Fabric puckers
- Colors don’t align
- Stitches overlap too much
- Excessive thread trims
- Uneven fill areas
A high-quality digitizing service solves all of these before you even start stitching.
Why You Should Avoid Auto-Digitizing Tools
While many software programs offer “auto digitize” features, they rarely produce professional-quality embroidery.
Auto-digitizing issues include:
- Wrong stitch type selection
- Zero control over density
- Random stitch pathing
- Poor handling of small text
- Unnecessary trims
- Misaligned outlines
- Poor fabric adjustment settings
Auto tools may work for extremely simple designs, but not for logos or client projects where precision is required.
What Makes a Great Digitizing Service?
Experience with different machine formats
PES, DST, JEF, EXP, VP3, XXX, PXF professionals know them all.
Understanding of fabric behavior
Each material needs its own density and underlay settings.
Clean pathing
Ensures smooth stitching without jumps.
File formatted exactly for your machine
Correct hoop size, resolution, and thread order.
Human digitizers (not auto software)
Craftsmanship matters.
Quick delivery & revisions
Important for business workflow.
How to Prepare Your Artwork for Digitizing
You don’t need perfect artwork, but preparing it properly helps.
Higher-resolution is better
Even a 1000×1000 pixel image makes digitizing easier.
Clean edges improve accuracy
Avoid blurry or pixelated logos when possible.
Simple colors work best
Too many gradients or effects may require modification.
Share instructions
If you want metallic thread, small size, or a specific stitch style, tell your digitizer.
Who Needs Digitizing Services?
- Embroidery shops
- Apparel brands
- Personalized gift businesses
- Schools, sports teams & clubs
- Uniform suppliers
- Promotional product companies
- Custom patch makers
Basically, anyone who wants clean, professional stitching.
Final Thoughts
Digitizing is the foundation of high-quality embroidery. Without proper stitch density, pathing, and underlay, even a top-of-the-line machine can’t produce clean results. Choosing professional digitizing ensures your hats, shirts, jackets, and patches always come out looking sharp and polished.